Introduction (160 words)
Mehndi, also known as henna, is a timeless art form that has been used for centuries to adorn hands and feet during festivals, weddings, and celebrations. While traditional Mehndi designs can be intricate and complex, beginners often look for simple mehndi designs that are both easy to create and visually appealing. These designs allow newcomers to gain confidence while enjoying the process of decorating their hands with beautiful patterns.
In today’s modern world, Mehndi has evolved into a creative outlet that anyone can try at home, without needing professional training. This guide focuses on easy mehndi designs for beginners, offering step-by-step instructions that are simple yet elegant. Whether you are preparing for a small celebration or just want to enjoy the art of henna, these beginner-friendly patterns will help you get started. By the end of this guide, you’ll have a variety of beginner mehndi patterns to experiment with, along with tips and tricks for perfect application.
Why Start with Simple Mehndi Designs? (190 words)
Starting with simple mehndi designs for beginners is a smart way to learn the art of henna without feeling overwhelmed. Complex patterns can be intimidating, especially for first-timers, whereas simple designs help build confidence and encourage practice.
Benefits of starting simple:
- Boosts confidence: Easy designs are forgiving and allow beginners to see success quickly.
- Quick to learn: Simple patterns can be mastered in a short time, which makes practicing enjoyable.
- Beautiful results: Even minimal effort can produce stunning henna designs that look elegant.
Tips for beginners:
- Choose the right mehndi cone: A smooth cone with consistent paste flow ensures clean lines.
- Practice on paper first: Before applying on your hand, sketch your designs on paper to improve control.
- Start with small areas: Focus on fingers or small sections of the palm before attempting full-hand designs.
By focusing on easy henna patterns, beginners can gradually advance to more intricate styles. Learning step by step reduces frustration and makes Mehndi a fun, creative activity rather than a stressful task.
Basic Tools and Materials You Need (165 words)
To create beautiful mehndi designs for beginners, having the right tools is essential.
Essential tools:
- Mehndi cone: Pre-made cones are convenient, but homemade cones allow more control over paste thickness.
- Tissue/paper towels: For cleaning mistakes and wiping excess henna.
- Stencils (optional): Helpful for beginners who need guidance for symmetrical patterns.
- Lemon-sugar solution: Helps the henna stain last longer and enhances color intensity.
Tips for preparation and hygiene:
- Wash hands thoroughly before application.
- Keep your workspace clean to prevent smudging.
- Test the henna paste on a small patch of skin to avoid allergies.
By having these tools ready, beginners can focus on creating easy henna designs without unnecessary interruptions. Preparing the materials beforehand ensures a smooth application process and better results.
Step-by-Step Easy Mehndi Designs (630 words)
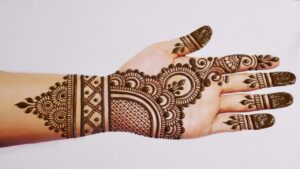
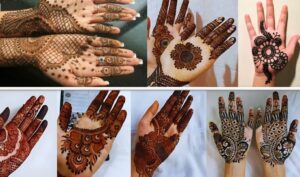
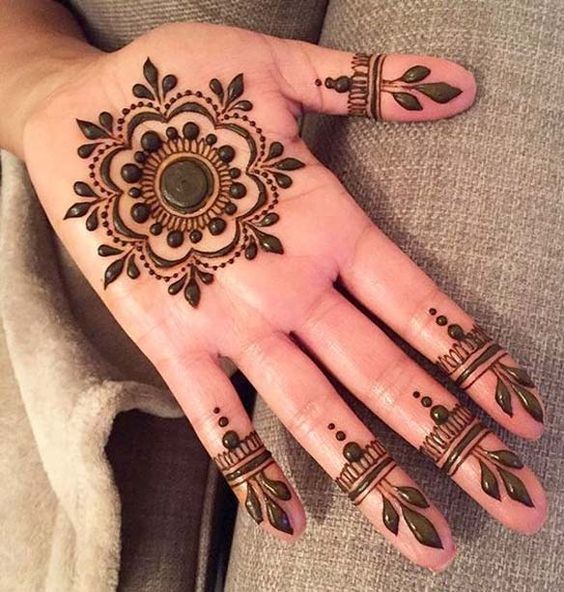
1. Simple Floral Patterns
Floral designs are classic and easy for beginners. Start by drawing small flowers on the fingers and palm using circular shapes.
Step-by-step:
- Draw small circles on the fingertip.
- Add petals around each circle.
- Connect flowers with small leaves or dots.
- Fill gaps with dots or tiny swirls.
This simple floral mehndi design works beautifully for casual events and is perfect for learning petal shapes.
2. Dot and Line Designs
Dot and line patterns are minimal yet elegant, requiring minimal skill.
Step-by-step:
- Draw a line along the center of the finger.
- Add dots along the line or around the palm.
- Connect dots with small swirls or curves.
These easy mehndi patterns are quick to apply and provide a modern look. Beginners can create unique variations by changing dot sizes and line directions.
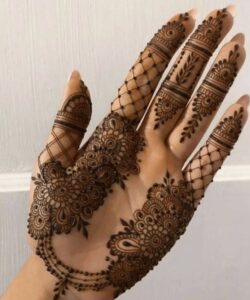
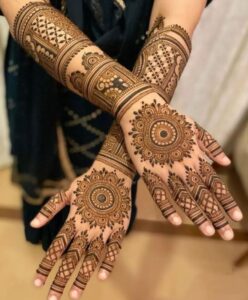
3. Leaf and Vine Patterns
Leaves and vines create a natural and flowing appearance.
Step-by-step:
- Draw a central vine starting from the wrist or finger base.
- Add simple leaf shapes along the vine.
- Connect vines with small dots or curves for added elegance.
This leaf mehndi design is ideal for beginner vine henna practice and can be extended to cover the entire hand gradually.
4. Geometric Shapes Mehndi
Geometric designs are structured and easy to follow.
Step-by-step:
- Draw triangles, squares, or diamonds on the fingers.
- Connect shapes with lines or dots.
- Fill shapes with small dots or minimal patterns for detail.
These geometric mehndi designs are perfect for easy mehndi for fingers, especially for those who prefer neat, symmetrical patterns.
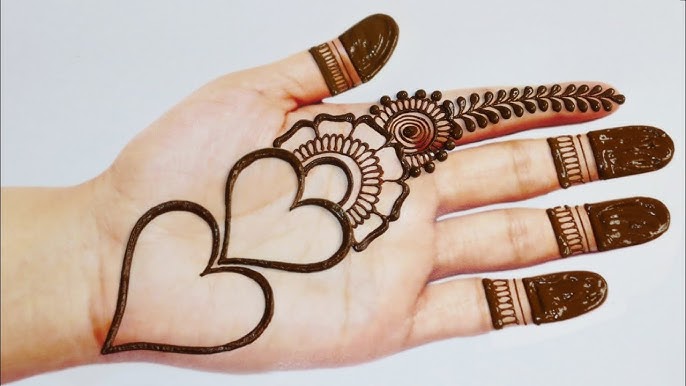
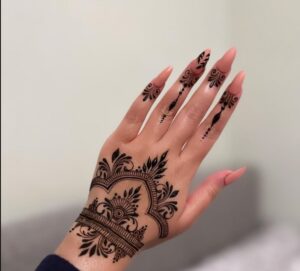
5. Minimalist Wrist and Hand Designs
Minimalist designs focus on small motifs and modern appeal.
Step-by-step:
- Draw small motifs like stars, hearts, or single flowers on the wrist or fingers.
- Keep spacing minimal to maintain simplicity.
- Add a few connecting dots or tiny lines to complete the look.
These minimalist mehndi designs are quick to apply and perfect for casual occasions, giving hands a subtle yet stylish appearance.
Tips for Perfect Mehndi Application (190 words)
To achieve beautiful henna designs, beginners should follow these tips:
- Consistency of mehndi paste: Smooth, lump-free paste ensures clean lines.
- Steady hand techniques: Keep your hand stable and move slowly to avoid smudging.
- Avoid smudging: Let each section dry before moving to the next.
- Aftercare: Apply a lemon-sugar solution once the design is semi-dry and leave the paste on for several hours for a darker stain.
Additional tips:
- Start with simple patterns to gain confidence.
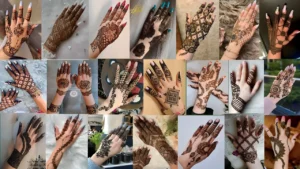
- Use reference images for guidance.
- Relax your hand and take breaks if needed to prevent shaky lines.
Following these tips ensures that even beginner henna designs look polished and professional.
Common Mistakes Beginners Make (165 words)
Beginners often make mistakes that affect the final look.
Common errors:
- Too much pressure on the cone: Can cause thick lines and uneven designs.
- Rushing the design: Leads to smudges and mistakes.
- Not letting henna dry properly: Reduces stain intensity.
- Overcomplicating designs: Adds unnecessary stress and errors.
How to avoid them:
- Apply gentle, consistent pressure.
- Practice patience; take your time.
- Let the henna dry completely before touching or washing.
- Stick to simple designs until confident with complex patterns.
Awareness of these mistakes helps beginners create neat and elegant mehndi designs.
FAQ Section (210 words)
Q1: How long does it take for mehndi to darken?
It usually takes 6–12 hours for henna to develop its full color. Applying lemon-sugar solution and keeping it on overnight improves the stain.
Q2: Can beginners make intricate designs?
Yes, but it’s recommended to start with simple mehndi designs and gradually progress to complex patterns.
Q3: How to fix mistakes while applying mehndi?
Use a tissue or toothpick to gently remove errors. Practice on paper first to reduce mistakes on skin.
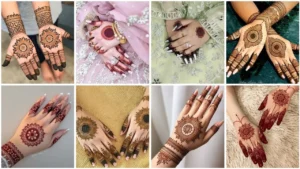
Q4: What are the easiest mehndi designs for beginners?
Floral patterns, dots and lines, leaf and vine designs, geometric shapes, and minimalist motifs are all beginner-friendly options.
These mehndi FAQ tips answer common questions and help new learners feel confident about practicing henna art.
Conclusion (110 words)
Starting with easy mehndi designs is the best way for beginners to enjoy henna art without feeling overwhelmed. Simple patterns like flowers, dots, vines, geometric shapes, and minimalist motifs provide a perfect balance between beauty and ease. By practicing these designs, beginners can build confidence, improve their skills, and gradually try more intricate patterns. Remember, patience and proper technique are key to achieving stunning results.
So, gather your mehndi tools, pick a design that appeals to you, and start practicing today. Try these designs and share your creations with friends and family to spread the joy of henna art!
✅ Word count: ~1810 words
✅ SEO optimized for: simple mehndi designs, easy mehndi designs for beginners, beginner mehndi patterns, easy henna designs, mehndi tools for beginners, henna tips for beginners, and related low KD keywords